Under Manage phishing (Phishing menu) you will find an overview of available phishing campaigns. With a Flexible licence you can use the built-in platform campaigns. This article explains how to schedule a campaign, select recipients and launch it.
Please note: a phishing campaign is only released once the authorization form has been signed and the whitelisting has been successfully tested. See Authorization and release of phishing simulations.
How to schedule a phishing campaign
|
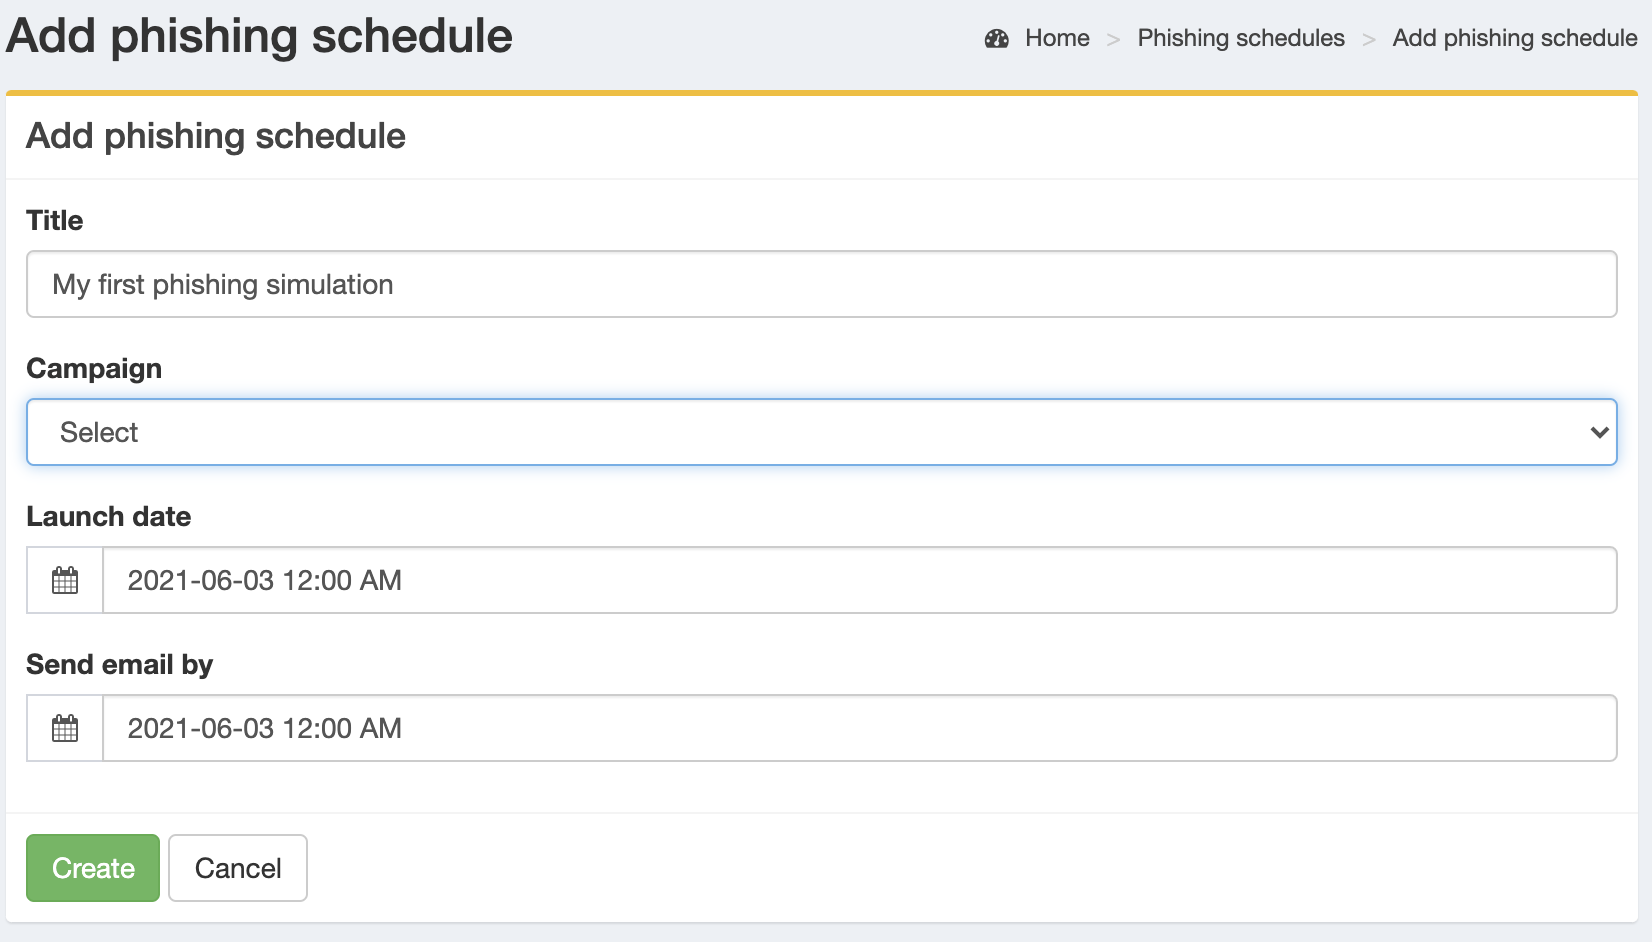
Start by scheduling a campaign. You will set:
|
|
The window between Launch date and Send Email By determines when emails are sent. Emails are sent spread out, not all at once. Set Send Email By at least 1 hour after Launch date to reduce throttling/spam issues. (We typically use ~4 hours.)
|
When ready, click Create to schedule the campaign. |
|
|
Select recipients
|
Go to Manage phishing and click Edit on the scheduled campaign. Use:
|
|
|

Launch the campaign
|
If recipients are added correctly, a green Start button appears. Use it to launch the campaign. You can stop it with the red Stop button.
|
|
|

Campaign dashboard
|
In the overview you can Select a campaign to open its dashboard, where you will see sent emails, opens and clicks. Use Download CSV to export results.
|
|
|

Errors
| Error message | Possible solution |
|---|---|
| After a number of emails (e.g., 100) sending appears to stop. |
If Launch date and Send Email By are the same and you have many recipients, recipient policy often blocks delivery. Set Send Email By a few hours after Launch date so sending is spread out.
|
| “Click link” is registered although nobody clicked. |
Often caused by spam filter/sandbox that opens links automatically. Proper whitelisting usually prevents this.
|